The original plan was to design a “no stress”, easy, mainly Stocking Stitch, cardigan with a V-shaped neckline, one that would keep my fingers moving in a calming, rhythmical way while I listened some good books and ignored the stress of an unknown killer virus on the loose around the world.
But somehow the design had other ideas.
I started the Back with a narrow rib – just enough to stop the fabric from rolling – and knit contentedly till I got to armhole height. I was not content. I looked at the ribbing and thought “I can do better than that”, even in a pandemic.

In my restless state I turned to watching a video from Interweave Knits by Marike Saarnit called Creative Estonian Knitting https://www.interweave.com/product/creative-estonian-knitting-video-download/?query=Estonian and there I found an elegant stitch called “Wrapped Nupp in Ribbing or “Flat Nupp”. A few trials with twisted knit & purl stitches to replace the regular 1×1 rib stitches, and a Nupp, and I was entranced.
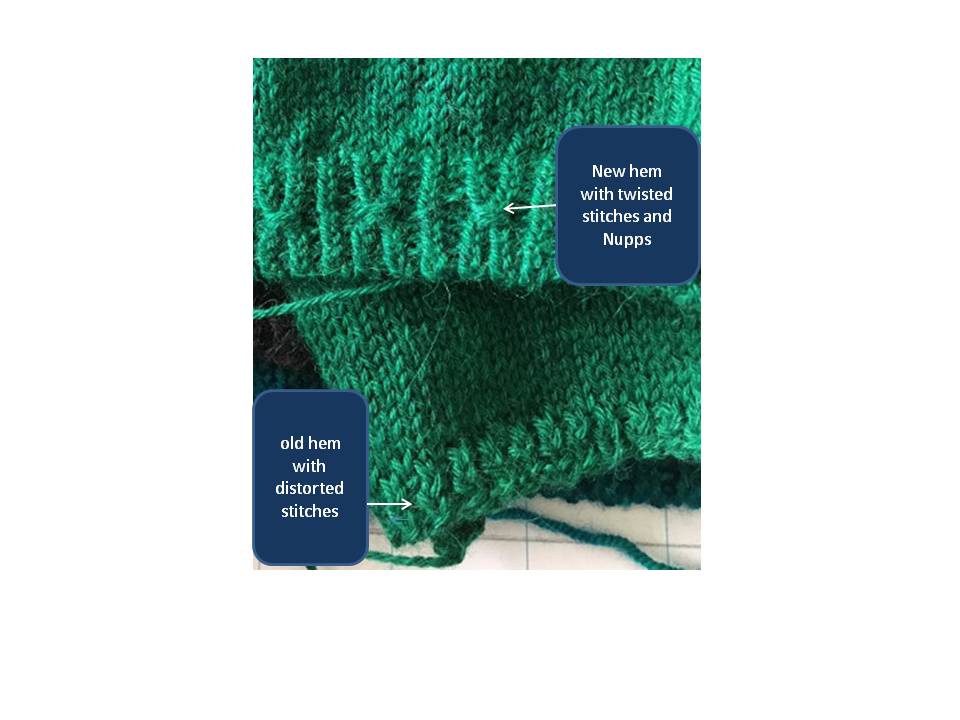
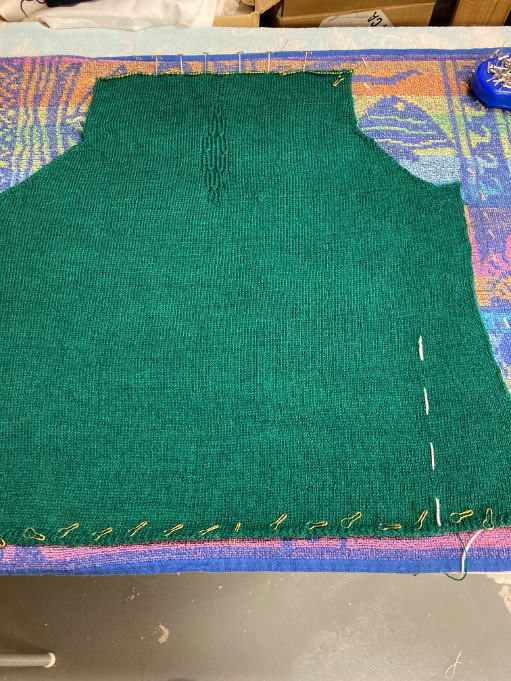
As I was bored of working plain Stocking Stitch by this stage – a Nupp medallion in the centre back would add some variety.
Inspired, I started with the sleeves, using the Estonian Nupp rib pattern
And there the garment pieces sat for several months, (back almost complete, sleeves almost complete) while I, distracted, was unable to decide on the design of the front. I did not think the Nupps, on their sides, with buttonholes spaced between them, would look attractive on the front V-shaped borders. No, something had to change.
Solution: change the front to a round neck featuring the Nupp ribbing, with plain front band. The Nupp ribbing would continue up the front as a few rows of twisted ribbing.
Stitches were picked up along the vertical front at a rate of 4 in 5 stitches as I noticed the ribbed edge seemed a bit stretched. The inside edge looked untidy and I do like my sweaters to look good if the front flaps open, so a double band, folded along an extra row of purl stitches, was the solution as it covered the untidy picked up edge.
Normally I would make a grafted button hole a la Lucy Neatby https://www.youtube.com/watch?v=jQQ_-urLlk0 (oh so satisfyingly tidy)… but my Covid brain could not face that, especially on a dark yarn. Solution: make a front band like those of Sidsel Hoivik.
which feature a narrow faced band with the buttonholes made in crochet.
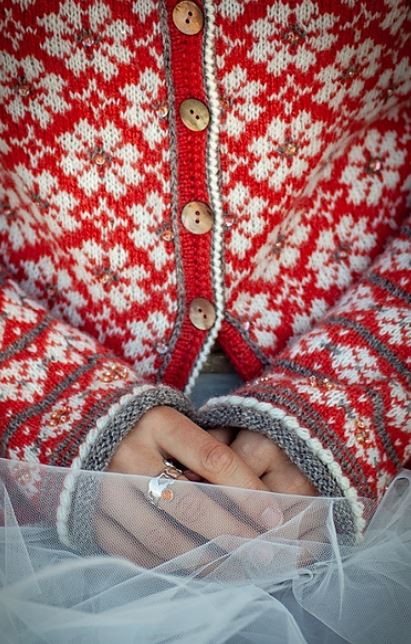
Much easier to construct. These buttonholes are almost invisible when not in use, which I like very much, too.
As this design was to be an everyday, go-with- everything cardigan, unlike Sidsel’s stunning garments, I kept it all in the emerald green.
Distraction is a very useful design technique. In this case the medallion on the back of the garment draws the eye to the shoulder level rather than at the hips and buttocks.
Pattern fitting changes for a figure with a generous bust and narrow shoulders, triangular shaped figure:
- Firstly the whole front is 2 inches wider than the back to accommodate the wider portions of the wearer
- Hip stitches were decreased to the armhole width, before the armhole is reached, on the back.
- On the front, no decreases were made from hip to armhole as the bust needed those extra stitches.
- A dart was inserted a few inches below the armhole to accommodate the bust,
- and, because this wearer has a slight curvature of the spine, some short rows were inserted at the upper shoulder level.
- On the front, to decrease the extra stitches to the width of the narrow shoulders, double decreases were worked, instead of single decreases, for the first 3 inches at the armhole shaping. (If this had been a sewing on fabric project, this decreases would have been an armhole dart)